
Product Partnership - Elkay

This post is written in partnership with Elkay but all opinions are our own. A couple months ago, we shared a blog post regarding a new product partnership AFT Construction established with Elkay and discussed a couple of their products we have incorporated into some of our recent projects, which include the Elkay Quartz Classic Sink and the Elkay ezH2O Liv Built-in Filtered Water Dispenser. As a follow up to the original post, we thought we would discuss the product selection process and the installation process.

Product Selection
When it comes to product selection, the process of selecting a sink is much more involved than for other products. This is simply because there are more choices available and many more variables to consider such as, the countertop that the sink will need to go with, location of the sink (bar, kitchen, etc.), and the type and finish of the plumbing fixtures. Fortunately, Elkay’s website makes it easy to view all of their sink offerings. (Pictured: Crosstown Stainless Steel Bar Sink) To get started, you are able to sort by material, installation type, room type, or collections. From there, the website offers high resolution photos of each sink (in each color) along with detailed dimensions to help us work with our clients to decide what they like best and what will look and work best for their application.
For a recent project, we selected this flawless Elkay Crosstown Stainless Steel Farmhouse sink! Selection of the ezH2O Liv Built-in Filtered Water Dispenser has less steps. The decision becomes as simple as deciding on a black or white finish and then whether the client wants their ezH2O to be non-refrigerated or with a remote chiller.

Product Installation
While the selection of the sink is more involved than the ezH2O Liv Built-in Filtered Water Dispenser, the installation is a fairly easy process. The majority of our clients opt for undermount sinks versus top mount, with farmhouse style sinks also being a popular choice. Undermount sinks are installed below the countertop to provide a more seamless look, while top mount or drop-in sinks are installed by “dropping” the sink into the cutout hole and sealing it to the top of the countertop.
Here at AFT Construction, we generally like to have our countertop fabricator and installer, also install our sinks. We find this provides a more seamless installation. For undermount sinks Elkay includes a cutout template that can be used to create the countertop cutout. Prior to installation, our countertop fabricator will use the template to cut out the hole for the sink as well as the mounting holes for the fixtures. Once the countertop cutouts are finished and ready for the sink installation, the first step is to fasten the mounting brackets into the pre-drilled mounting holes in the countertop. Silicone caulk is then applied around the top of the sink flanges. The sink is then aligned under the countertop opening and the silicone caulk-covered flanges are pressed up onto the countertop. The mounting brackets are tightened until the sink is snug against the countertop, excess caulk is wiped away, and installation is done.
While that may seem like a simple process, an experienced professional installer is always recommended. The overall process is similar for top mount sinks. For cutting the countertop opening, instead of using a template, you can simply position the sink upside down and trace a line around the sink. Then, you can add a second line about 5/16” inside the outline you just created around the sink. The next step will be to identify the faucet holes and punch them out from above the sink. Next, align the clips with the corresponding slots or holes. Apply silicone caulk around the cutout in the countertop surface and gently lower the sink into the cutout. Once lowered, clamp the clip into the clip base and turn the screw until the clamp engages the countertop. The final step is to wipe away any excess caulk.
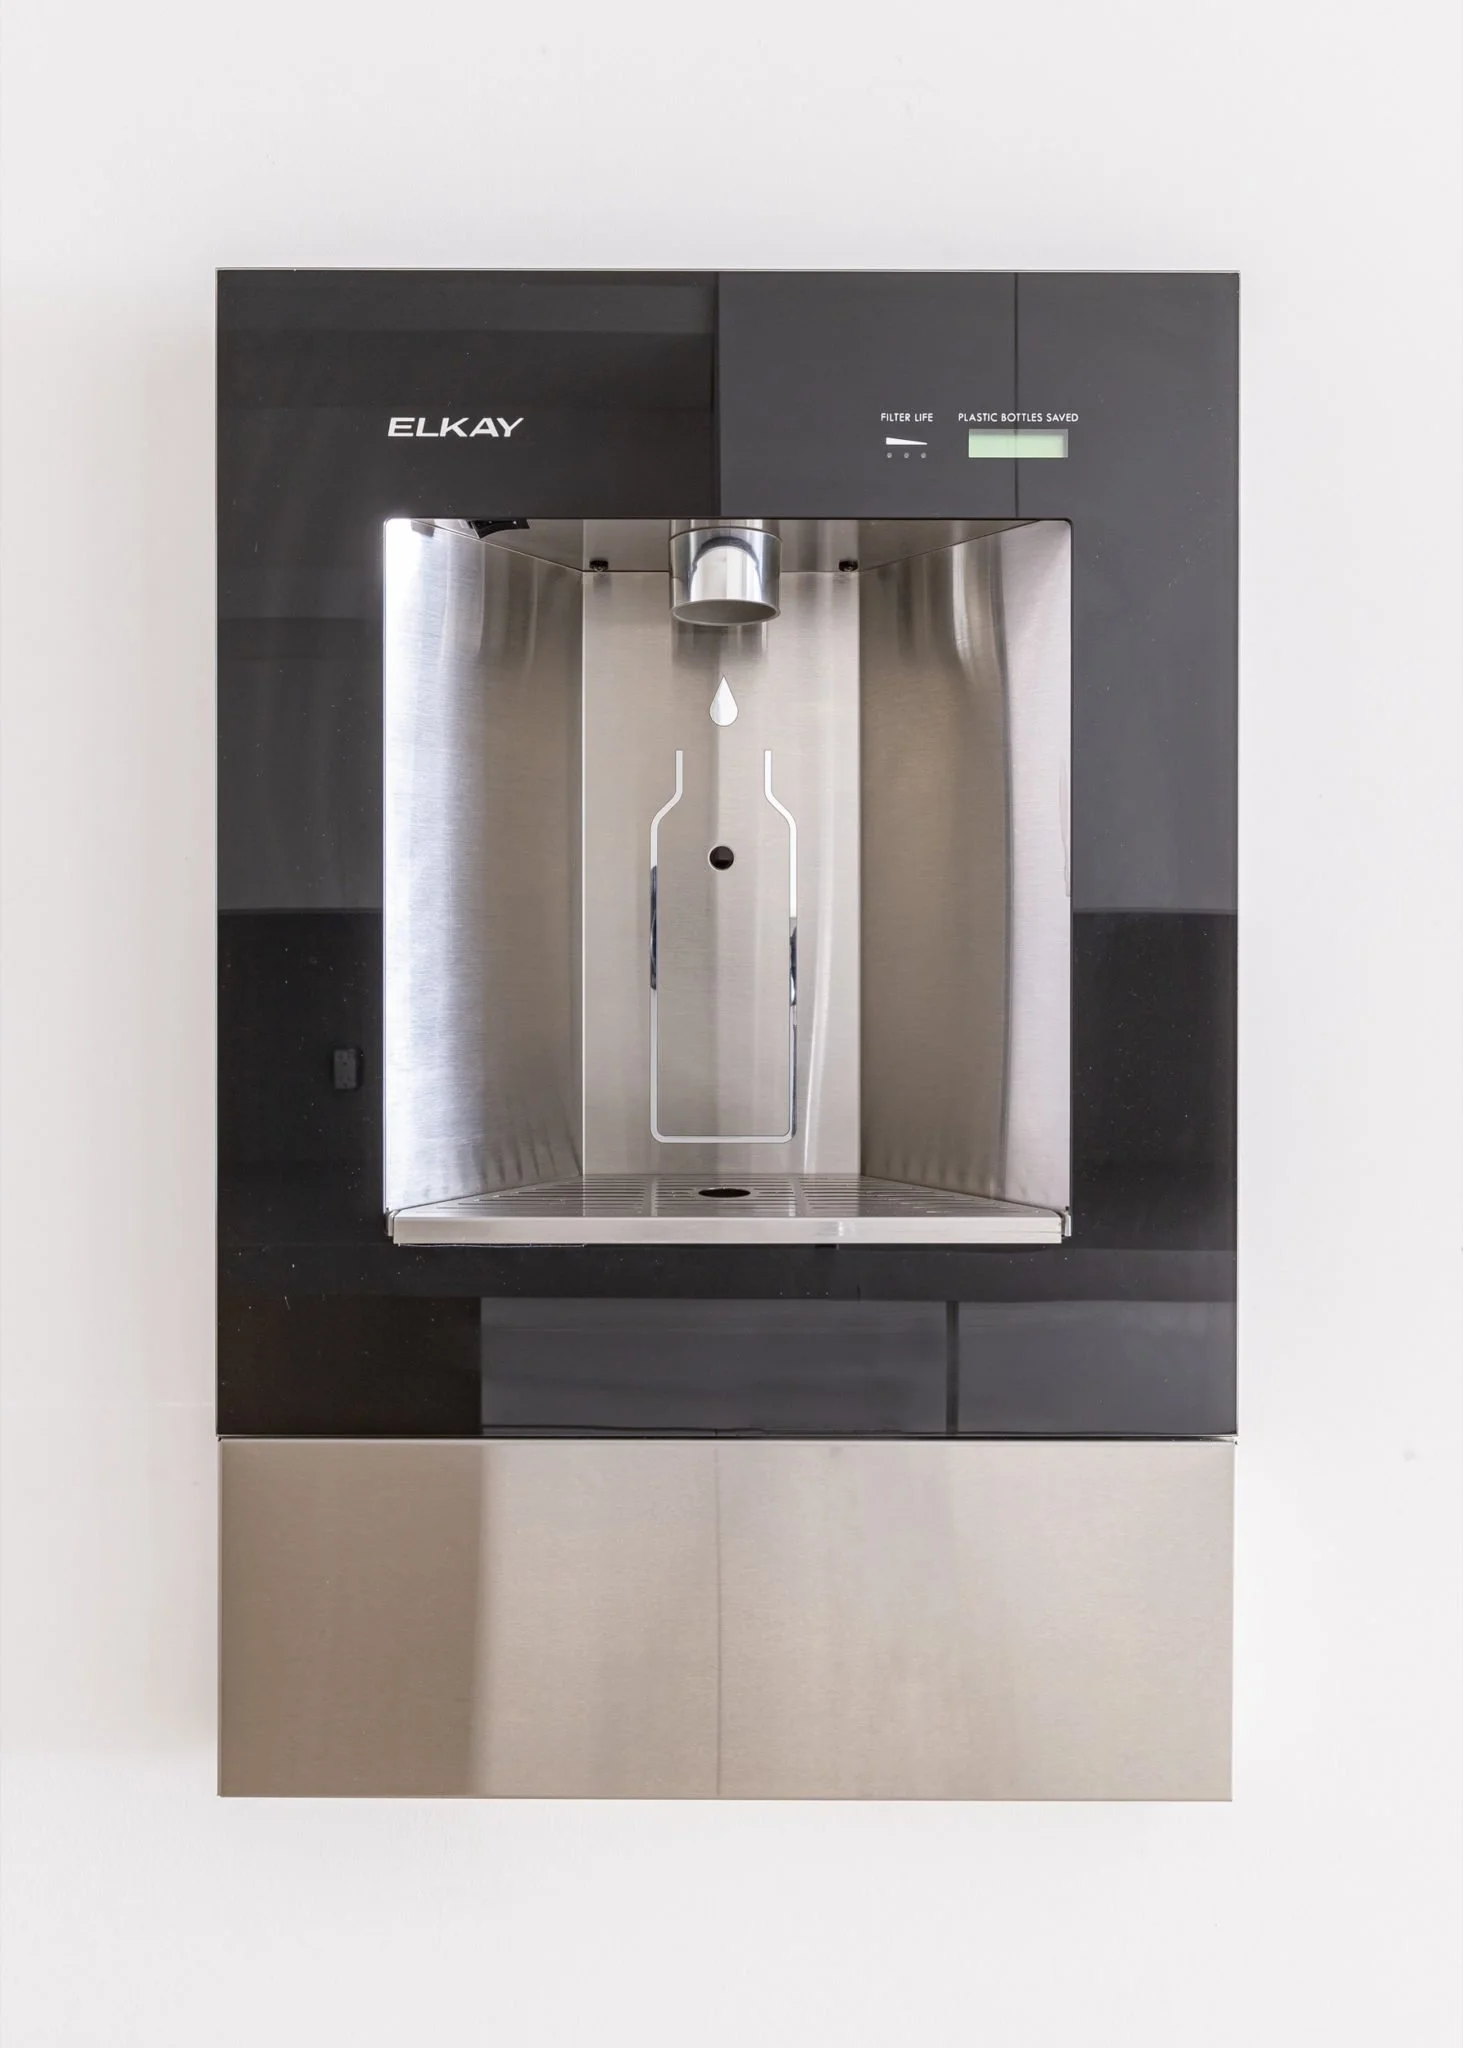
The installation of the ezH2O Liv Built-in Filtered Water Dispenser requires electrical and plumbing connections and begins earlier in the building process, especially for a new home construction. Once our client decides on the location and plumbing, the electrical will need to be installed inside the wall (behind the drywall) to service the ezH2O Liv. After drywall has been installed, an opening is cut into the wall using the suggested mounting dimensions. ezH2O Liv has been designed to mount in between two studs. Once the opening has been cut, the unit is placed into the opening, leveled, and attached to the studs. Once attached, the power supply is run to the unit and connected. The next step is to install the filter box, with the location dependent on the look the client wants and whether the unit will also have a remote chiller. If there is no remote chiller for the unit, the filter box can either be installed directly underneath the dispenser or up to 15 feet away from the dispenser. If a remote chiller is included, the filter box will need to be installed before the water chiller. Once the filter box and remote chiller are installed, the final step is to connect the catch basin drain (if included).
Here at AFT Construction, we like to be a resource for our clients to help make their decision-making be as stress-free as possible. By understanding the products available and how they are installed, we can help our clients meet their needs and design their goals.